Windsurf’s "Code Maps" Feature

Get Windsurf’s "Code Maps" Feature in Any IDE
Windsurf just released a "Code Maps" feature. It’s a brilliant way to visually understand AI-generated codebases so you don’t feel lost when making changes.
The problem? If you are already deeply integrated into Cursor, Claude Code, or a standard VS Code workflow, you can’t just switch IDEs solely for one feature.
Good news: You don’t have to.
You can create the exact same "Code Maps" functionality in your current setup using open-source tools. In this guide, I’ll show you how to set up visual code maps to 10x your AI coding throughput and quality.
Watch the full video here:
<iframe width="560" height="315" src="https://www.youtube.com/embed/HKIEkdSxefw" title="Windsurf Code Maps in any AI tool (Claude Code, Cursor, VScode)" frameborder="0" allowfullscreen></iframe>The Problem: Velocity vs. Understanding
AI coding velocity is incredibly high. But there is a hidden trap:
- Low Understanding + High Velocity = "Slop Code." If the AI (or you) doesn't understand the context, it generates messy code very quickly.
- High Understanding + High Velocity = 10x Throughput. This is the sweet spot.
Human engineers take months to build a mental model of a complex codebase. AI agents face the same struggle. When you ask an AI a question like "How does auth work?", it usually has to perform a blind "grep search," exploring files one by one to build a mental picture.
The Result of Blind AI:
- High token usage (expensive)
- Slow response times
- High risk of hallucinations
The Result of Mapped AI:
- Instant context
- Low token usage
- Accurate navigation
The Solution: Dependency Cruiser
To replicate the Windsurf experience, we need two things:
- A way for Humans to visualize the code (a UI).
- A way for AI to understand the structure (a text representation).
We can achieve both using a simple open-source library called dependency-cruiser.
Step 1: Installation
Open your terminal in your project folder. We need to install the package and initialize it.
Bash

Step 2: Initialization
Run the initialization command to tell the tool where your source files are.
Bash

It will ask you which folders to scan. For a typical Next.js or React app, you’ll want to select folders like app, lib, components, or src. You can leave the rest as defaults.
Step 3: Generating the Map
This is the magic step. We are going to generate a .dot file. This file contains the graph logic that represents your entire codebase.
Run this command:
Bash
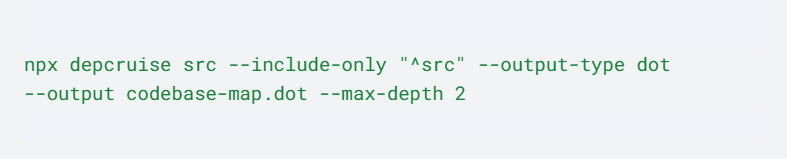
(Note: Adjust src to match your source folder. You can change --max-depth 2 to a higher number if you want a deeper, more complex map, but keeping it low usually provides the best high-level context).
How to Use the Map
Now that you have your codebase-map.dot file, here is how to use it to supercharge your workflow.
For Humans (Visual Navigation)
To see the beautiful visual graph like Windsurf provides, you need a VS Code extension.
- Go to the Extensions marketplace.
- Install Graphviz Interactive Preview.
- Open your newly created codebase-map.dot file.
- Click the preview button.
You can now zoom, scroll, and click through your architecture. You can instantly see how your Login component connects to Supabase which connects to your Auth routes.
For AI (Context Injection)
This is where the performance gains happen. The .dot file is just text—a text description of your entire architecture.
The Workflow:
- Open a new chat with Claude or Cursor.
- Paste the content of codebase-map.dot into the chat (or @ reference the file).
- Ask your question (e.g., "How does the auth logic work?").
The Difference:
- Without Map: Claude burns 35k tokens and takes 45 seconds calling tools to search for files.
- With Map: Claude reads the graph, instantly sees the relationship between login.tsx and auth-service.ts, and answers immediately.
Conclusion
You don't need to switch tools to get better AI performance. You just need to provide better context.
By generating a Code Map, you give both yourself and your AI agent a "birds-eye view" of the project. This prevents the AI from getting lost in the weeds and ensures that when you move at high velocity, you're moving in the right direction.
The Reality Check:
- Setup time: ~5 minutes.
- Maintenance: Re-run the generation command occasionally when you add major features.
- Payoff: Significantly smarter AI responses and less time debugging "slop code."
We can simplify this process for you — get in touch!
Want to discuss this?
Book a call→