How to build an iFrame Embedded Widget in Bubble?

iFrames are lightweight, simple, and flexible; they let you place a webpage inside another webpage, or display an HTML-based webpage inside your application.
This video tutorial will guide you through the steps that you need to take to build an iFrame embedded widget using Bubble.
Detailed step-by-step guide is as follows.
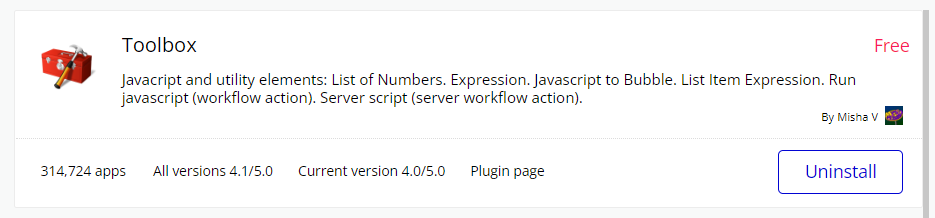
1. Install Toolkit Plugin
To get started you’ll need to install the Toolbox plugin. This plugin is required for running javascript in bubble.
To install the plugin, head over to the “Plugins” tab in your bubble editor and search for “Toolbox”.
Install the plugin shown below.

2. Update the Settings
The second step is to update the settings for the iframe to work.
In Settings, Go to the “General” tab and update the following:
- Allow to render the app in a frame/iframe (X-Frame-Options) > Allow all iframes
- Do not set cookies on new visitors by default > Checked
- Expose the option to add an ID attribute to HTML elements > Checked
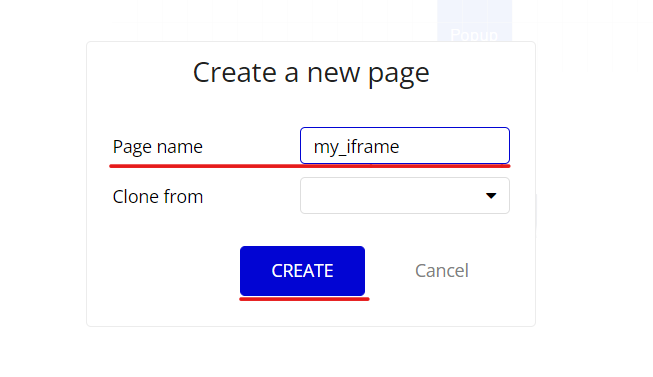
3. Create a new Page
Now we will create a new page for the iframe.

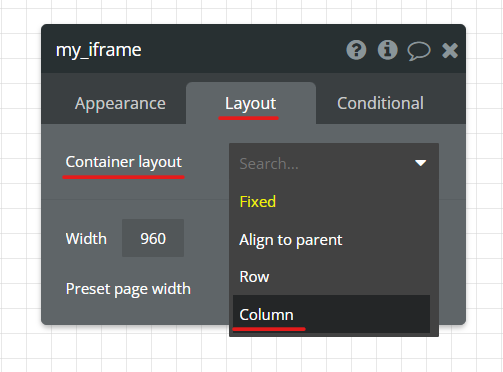
Then, set the Container layout to “Column” as shown below.
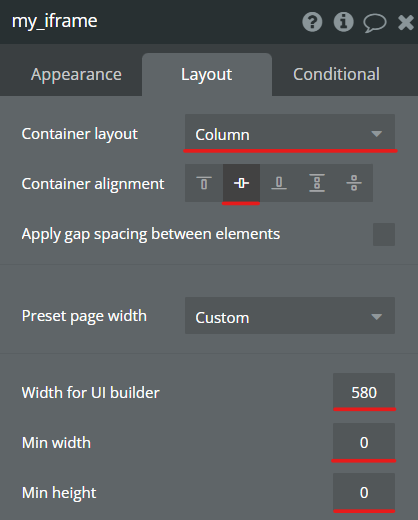
Now, apply the following Layout Setting to the page as shown below.
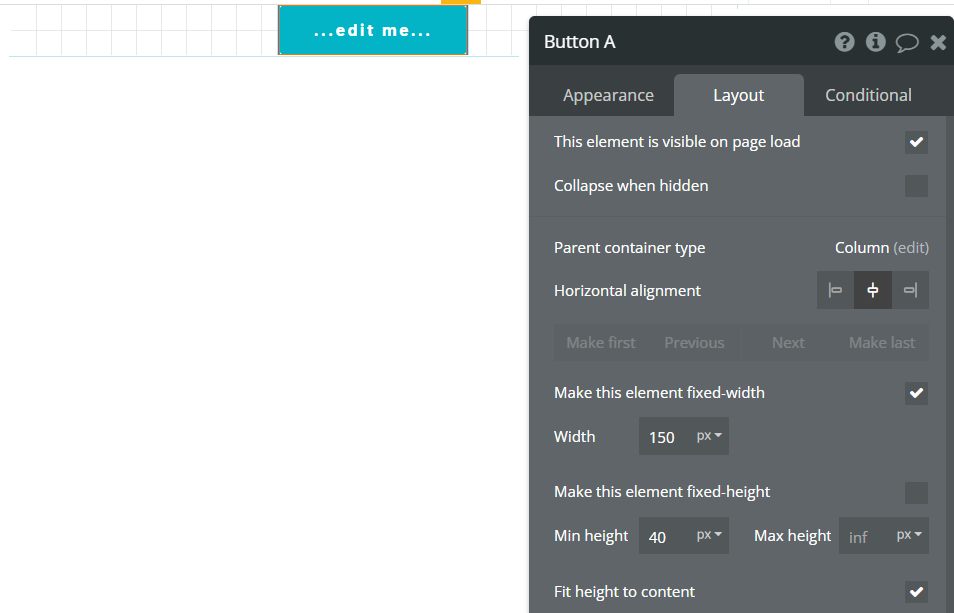
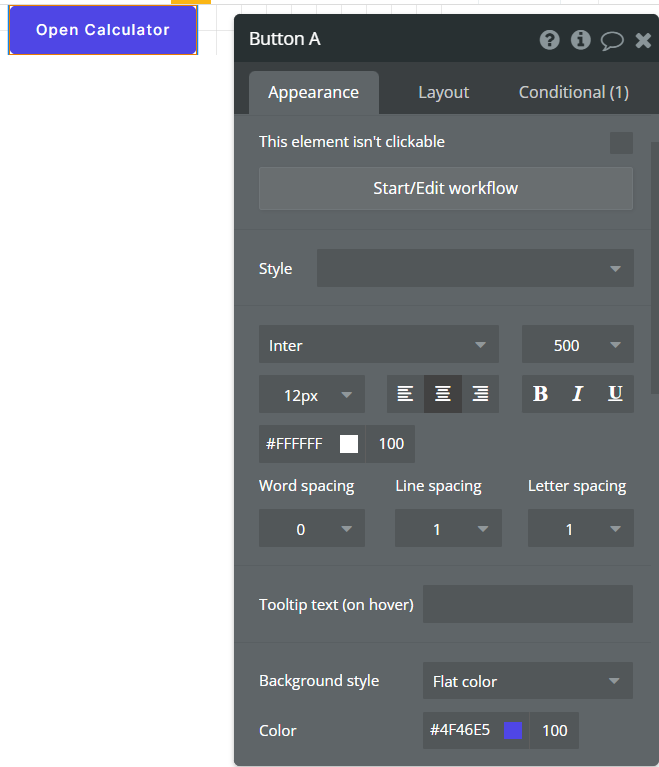
4. Add a Button for opening the Widget
Drag and drop a button onto the canvas. This button will be used as a trigger to open the widget.
Apply the following Layout settings as shown in the image below.
In the “Appearance” tab, you can style the button according to your liking.
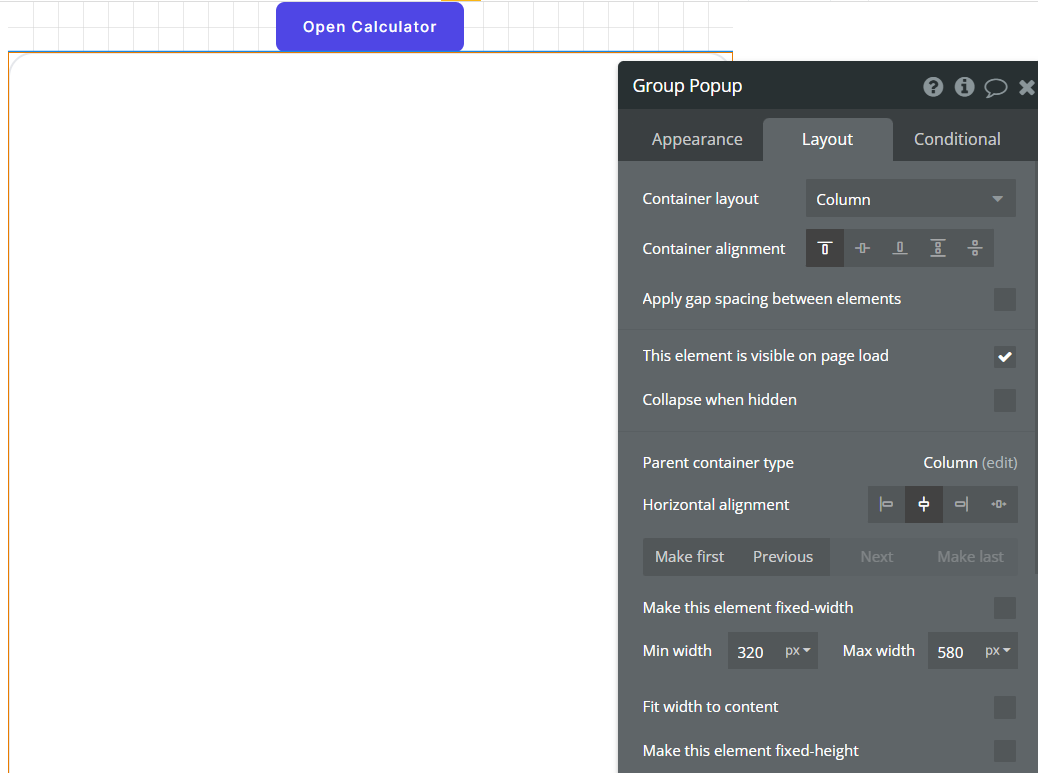
5. Design the Popup
Add a group to the canvas below the button.
Apply the following Layout Settings as shown below. For now, temporarily we are not setting the Min height equal to zero.
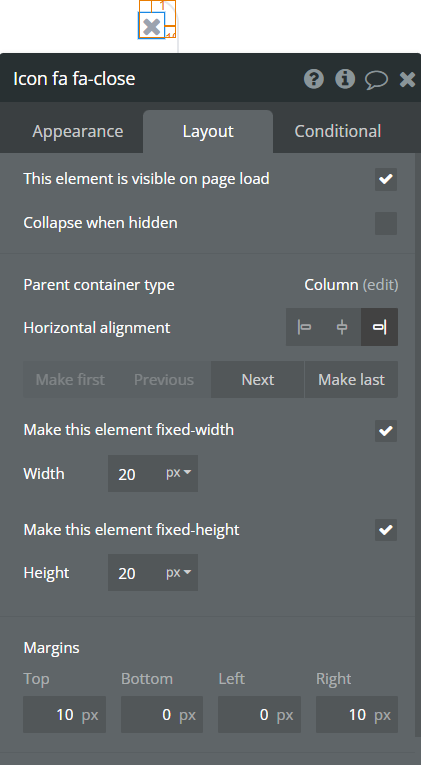
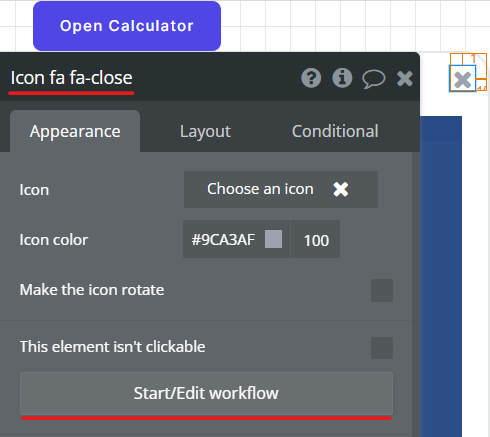
Add a close icon to the Group.
Set the Width and Height fixed as shown below.
6. Design the Calculator
Add a new group below the “close” icon.
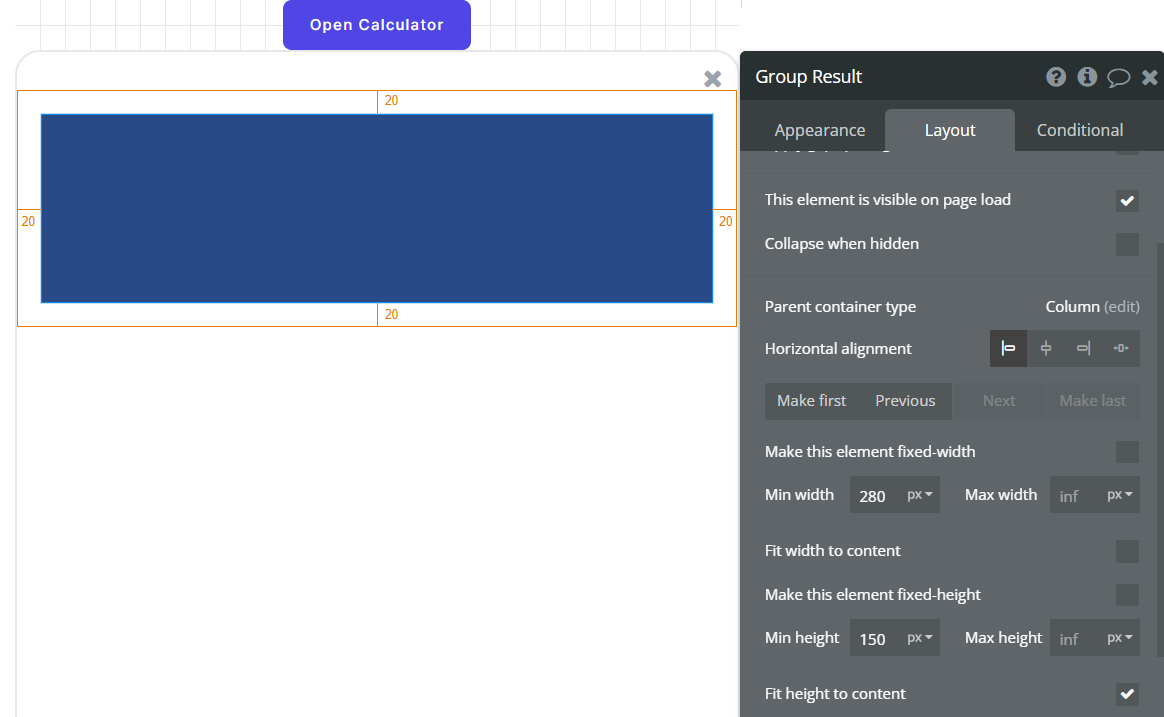
Set the “Min width” to 280px and set the “Min height” temporarily to 150px.
Also, add the 20px margin on all sides.
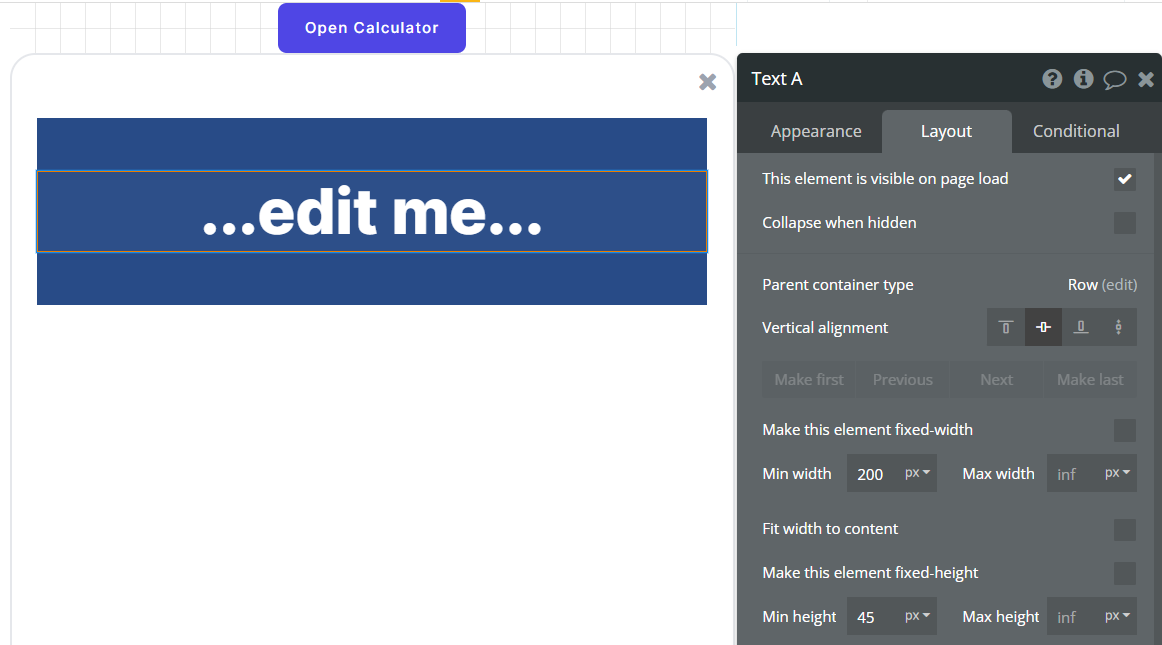
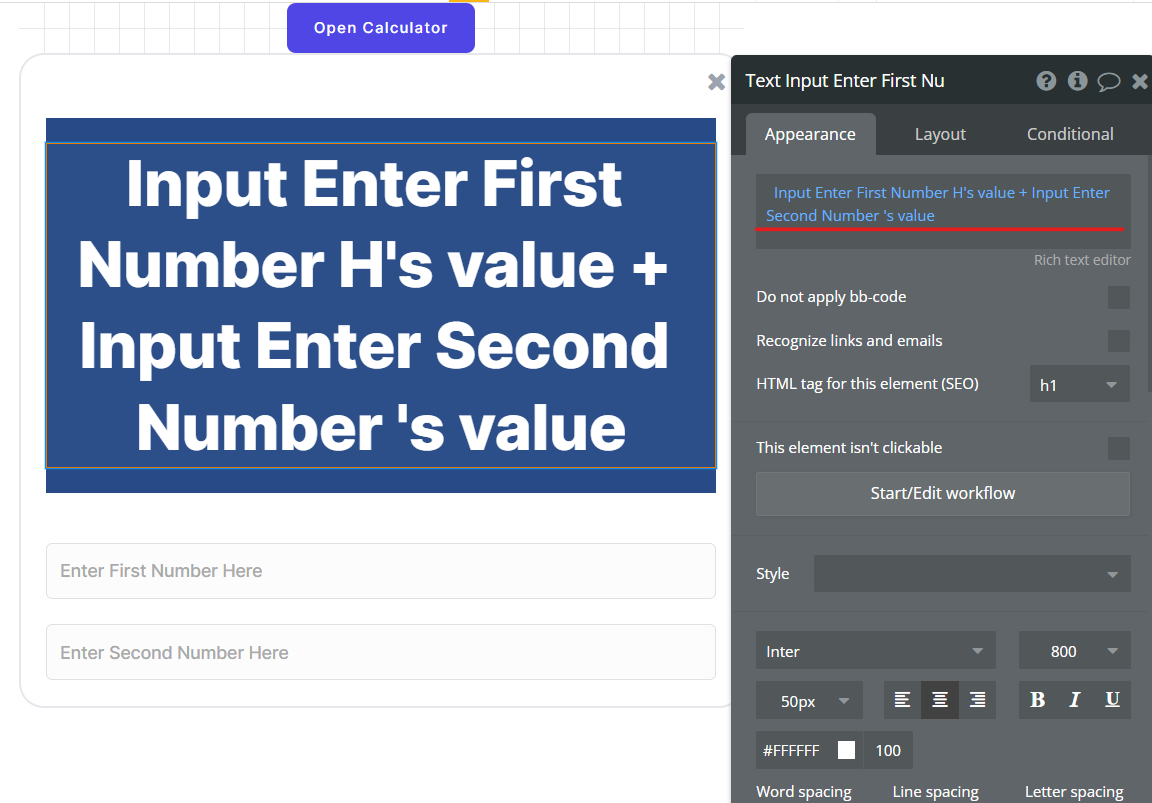
Add a text element to the Group with the Layout settings as shown below.
Now, we will add another group below the Group “Result”.
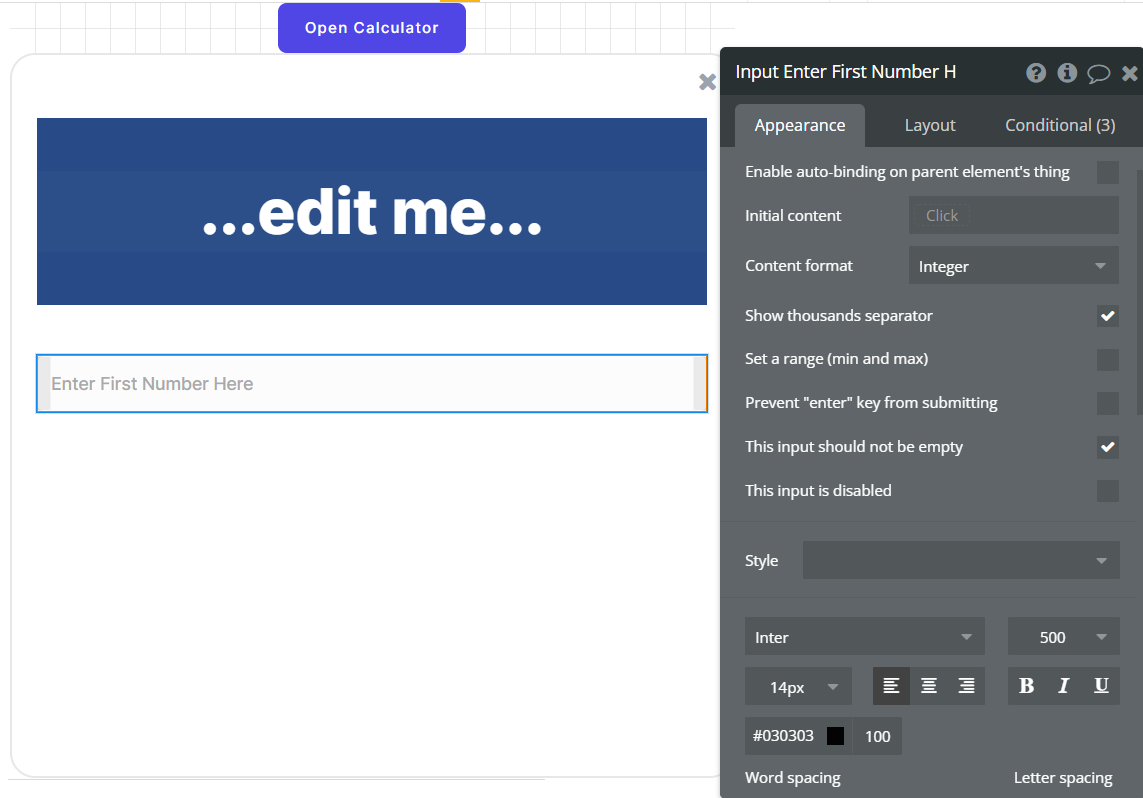
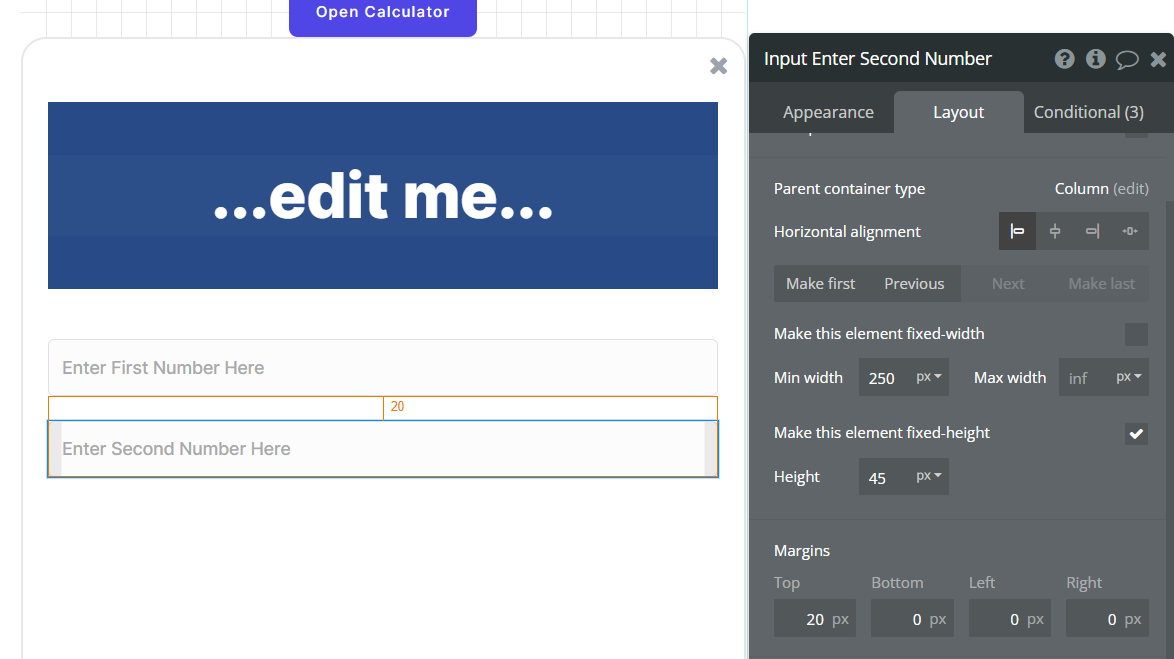
Add an “Input” field to the group.
Set the Content format to “Integer”

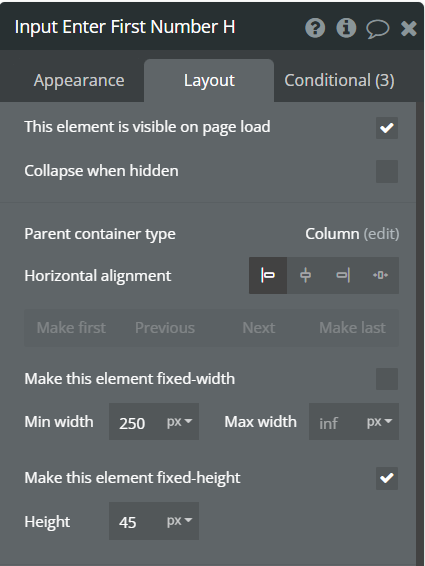
Apply the following Layout settings as shown below.
Similarly, add another “Input” field to the group as shown below.
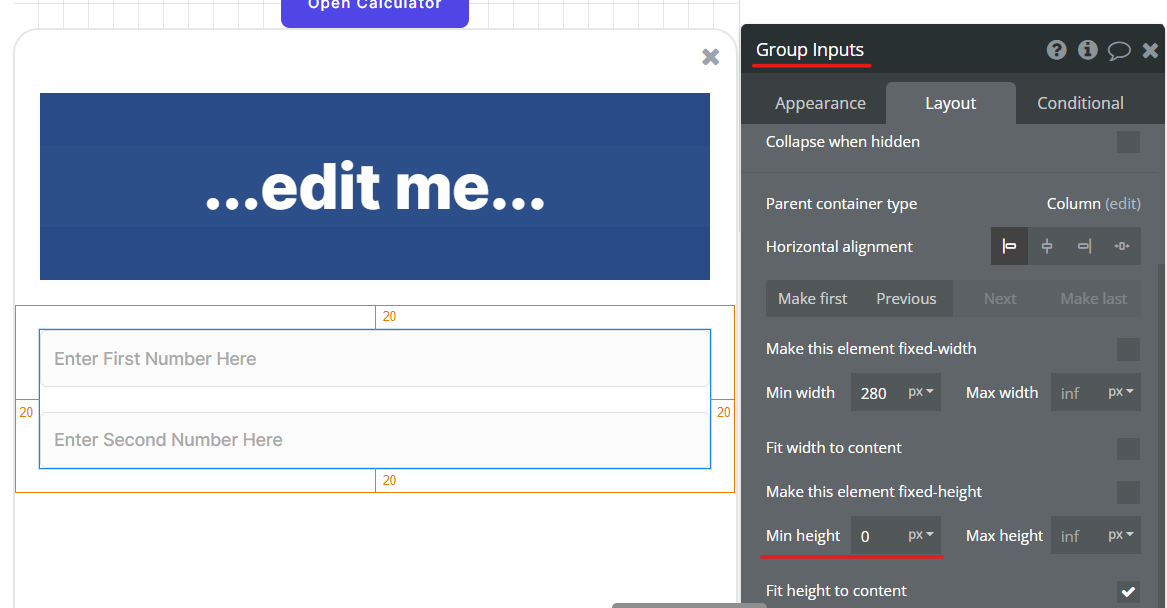
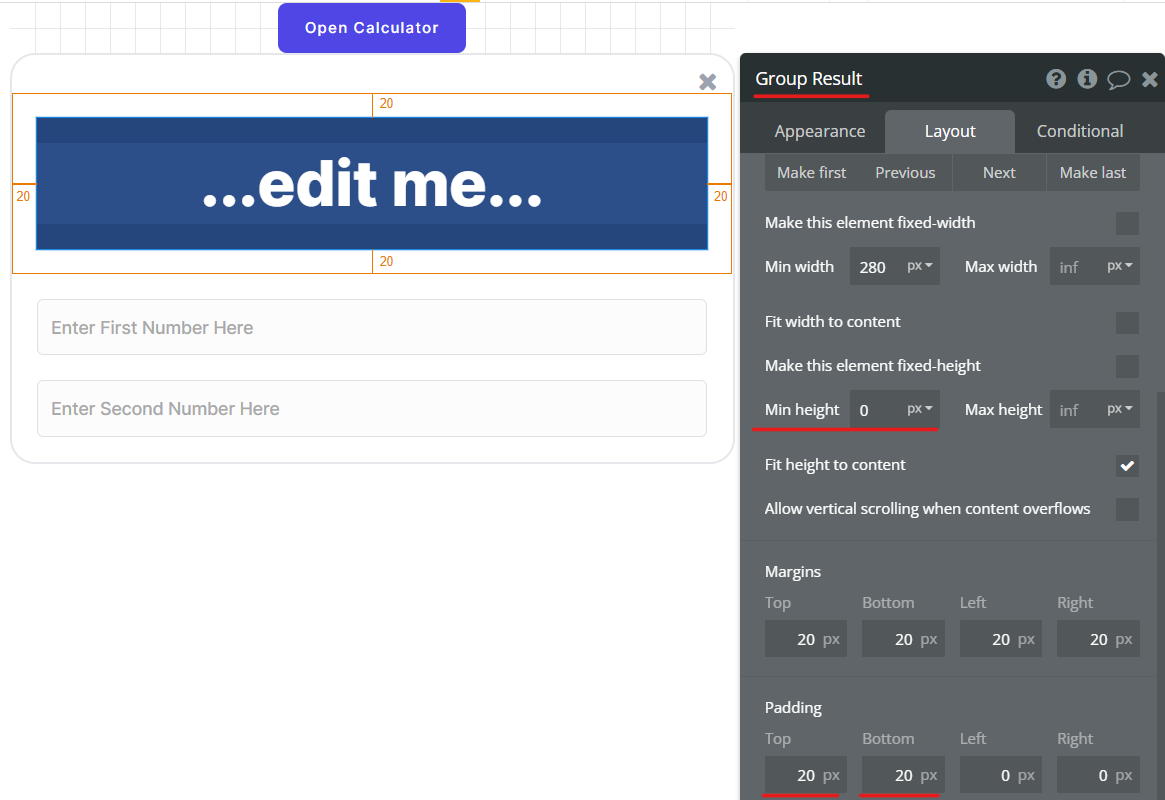
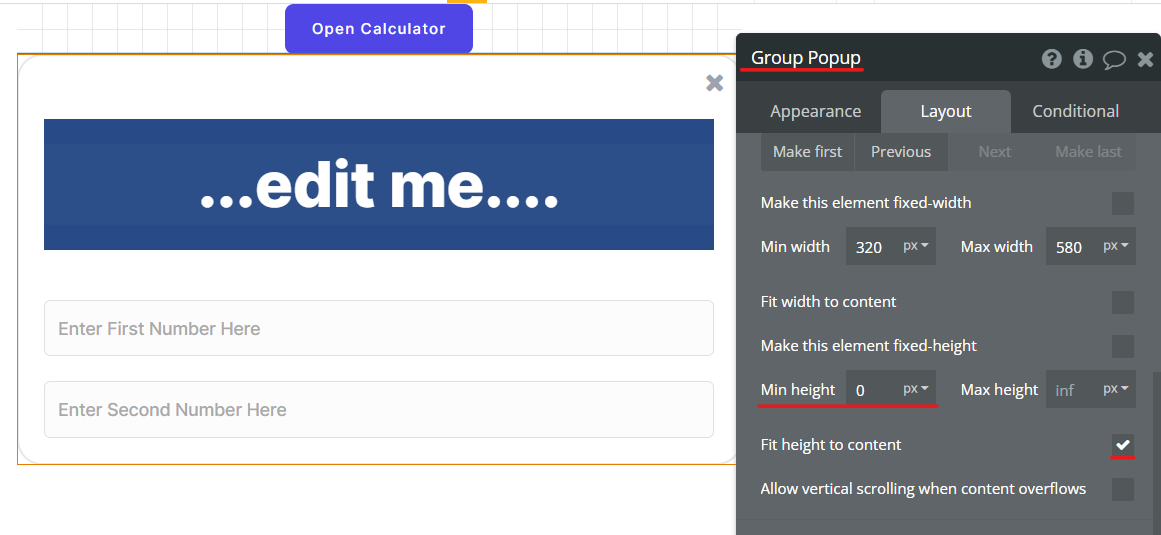
7. Set the Min Height of the groups equal to zero
Now that we are done with the designing, we can now set the Min height of all three groups equal to zero.
Firstly, set the Min height of the “Group Inputs” equal to zero.
Then, set the Min height of the “Group Result” equal to zero.
Lastly, set the Min height of the “Group Popup” equal to zero.
8. Add the Addition functionality to the Calculator popup
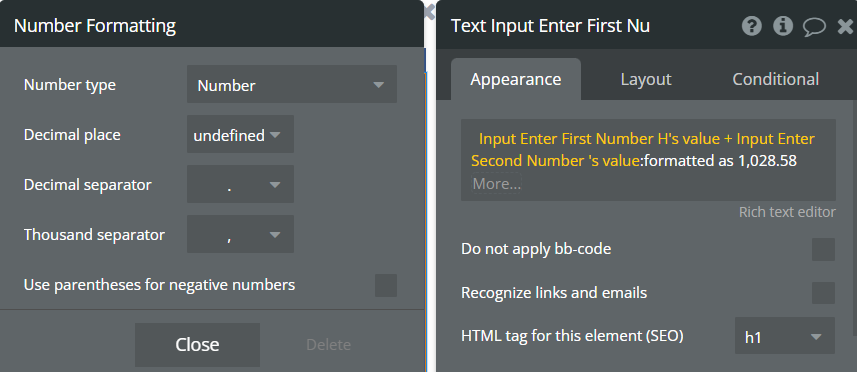
Enter the following expression to the text element as shown below.
Format the text by setting “,” as Thousand separator and “.” as Decimal separator.
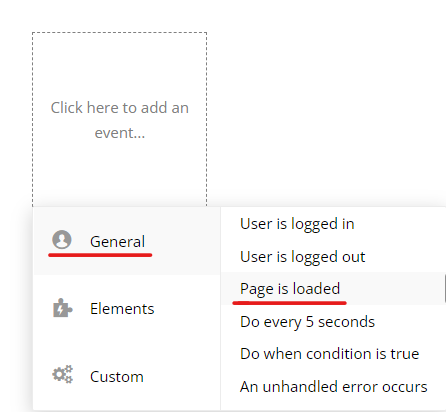
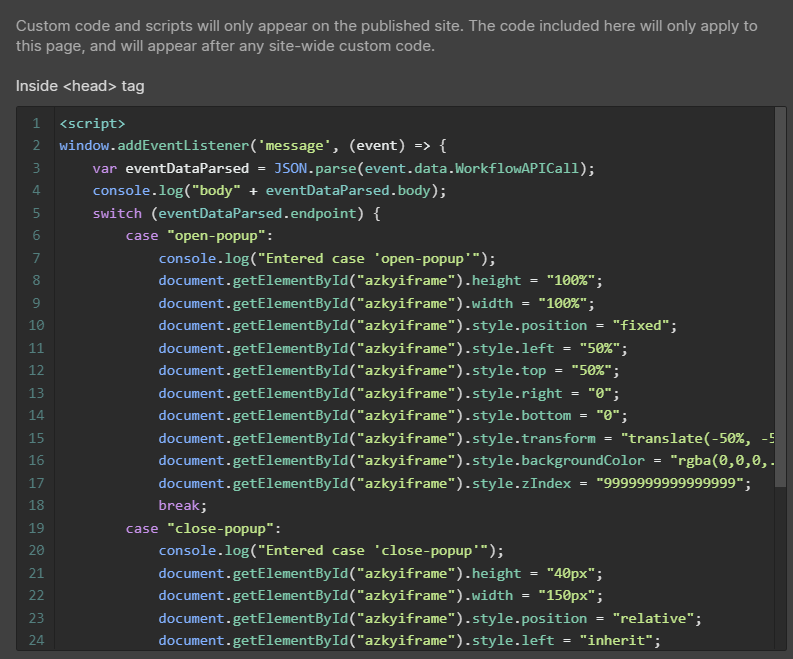
9. Add Workflows
Now we will add workflows for running the javascript whenever the popup is opened or closed.
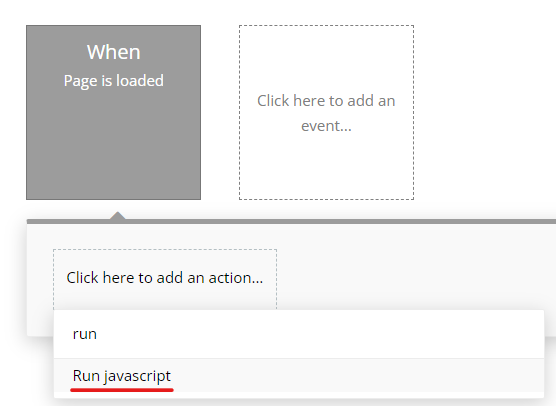
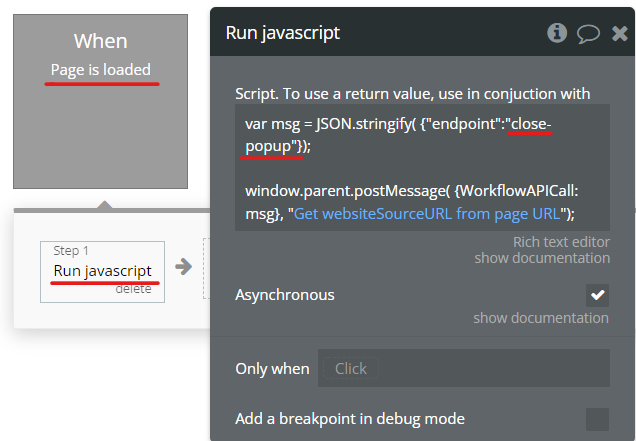
Go to the workflow tab and add an event of “Page is loaded”.
Add the action of “Run javascript”
Add the following script as shown in the image below.
This script keeps the popup closed on the page load.
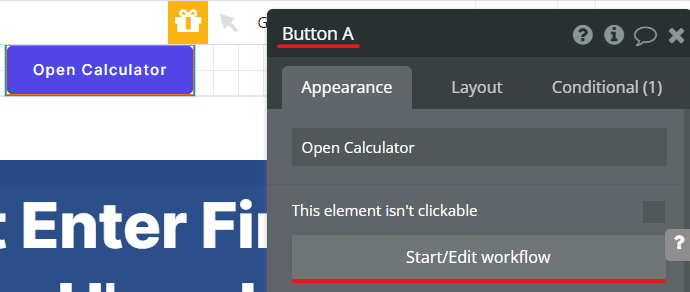
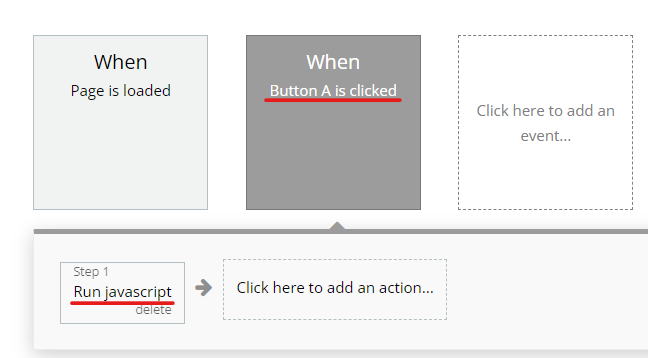
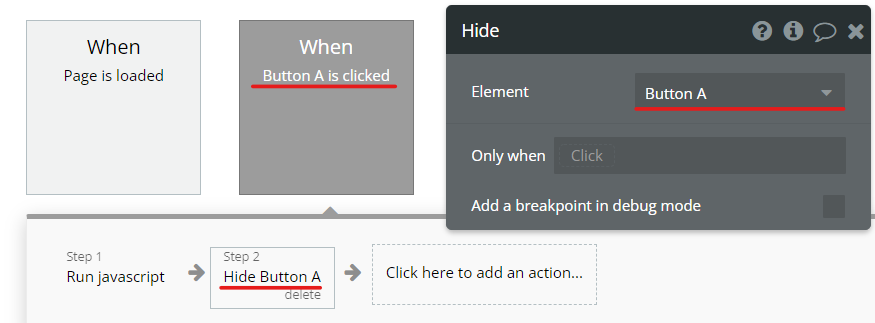
Now, start the workflow of the button “A”.
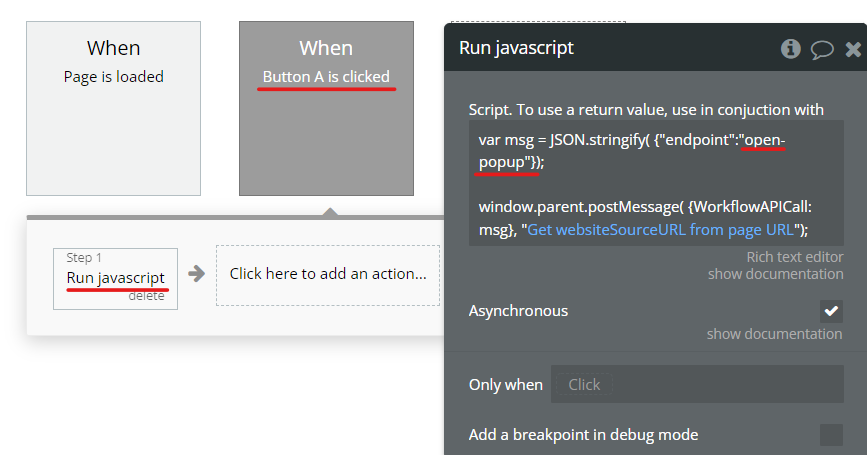
Again, add the action of “Run javascript”
Add the following script as shown in the image below.
This script will open the popup whenever “Button A” is clicked.
The “Button A” should disappear whenever the popup is open.
So, we hide the “Button A” in our step 2 action.
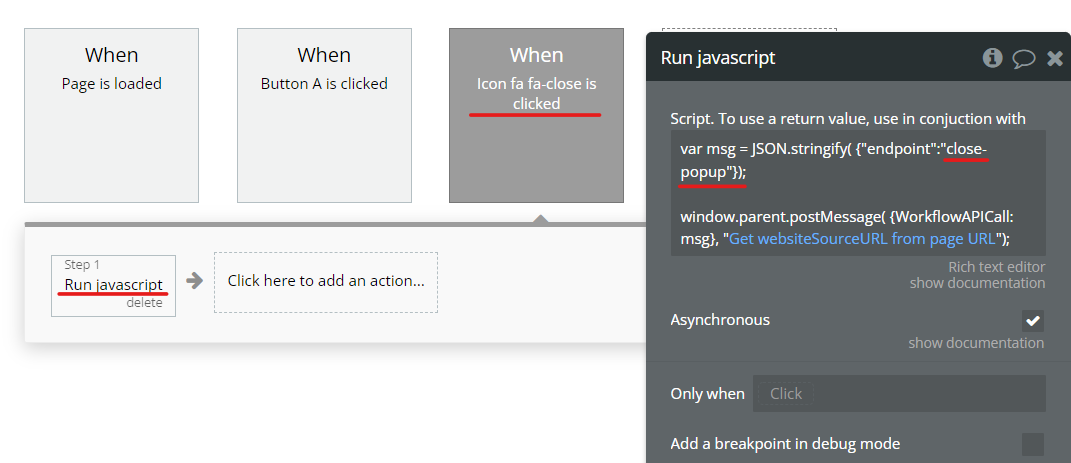
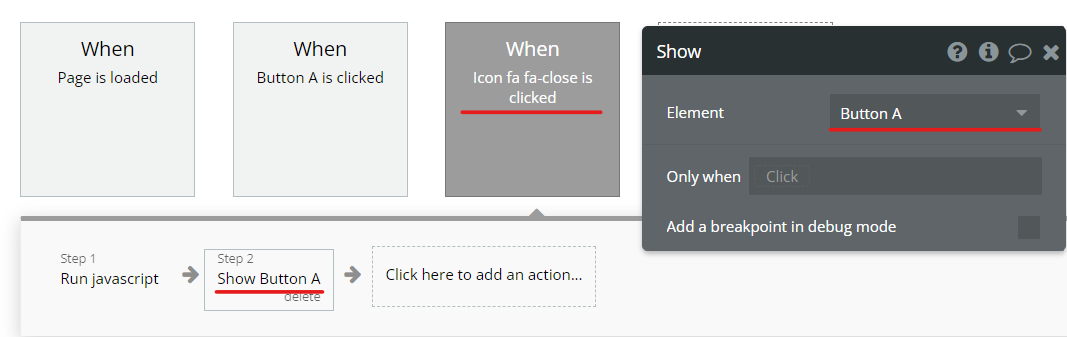
Now, we will start the workflow on the “close” icon.
Add the action of “Run javascript”
Then add the following script as shown below.
This will close the popup whenever the “close icon” is clicked.
Once the popup window is closed, we will display the button again.
So, we will add the “Show an element” action to “Button A”
At this step, we are done with our iFrame widget. Now we can embed this widget on any of our website.
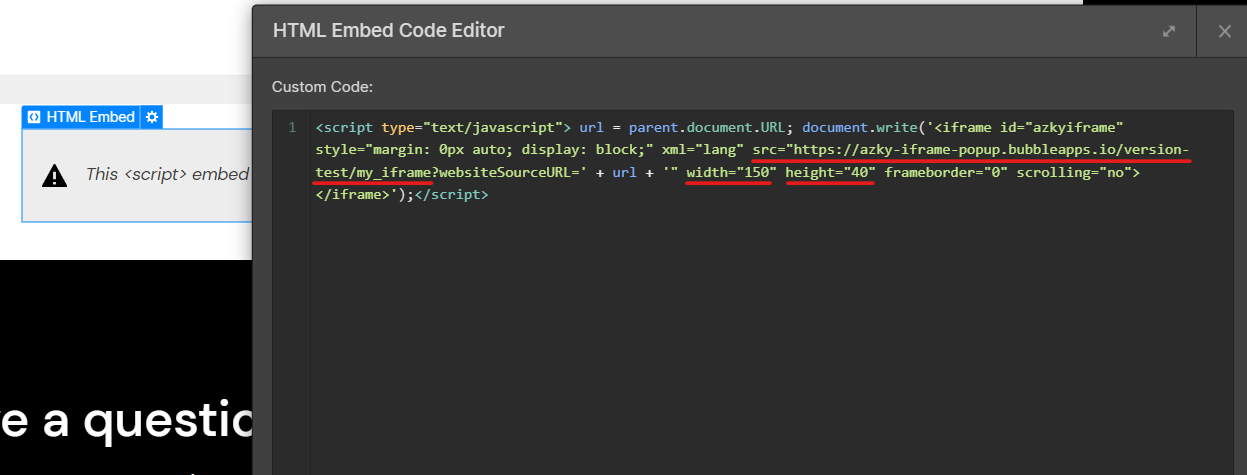
10. Embed the iFrame
Now, Copy and paste the iframe code to your website or blog.
Add the following script to the header of the page.
To get the code shown in the image below, submit your email below.
hbspt.forms.create({ region: "na1", portalId: "19911870", formId: "05f7e00e-4b0a-4bae-b672-2f5739ce99a5" });
Then, add the following script as shown below to an HTML embed element.
Change the src attribute to the URL of your iFrame page.
Also, set the width and height equal to one of the Buttons that will open the widget.
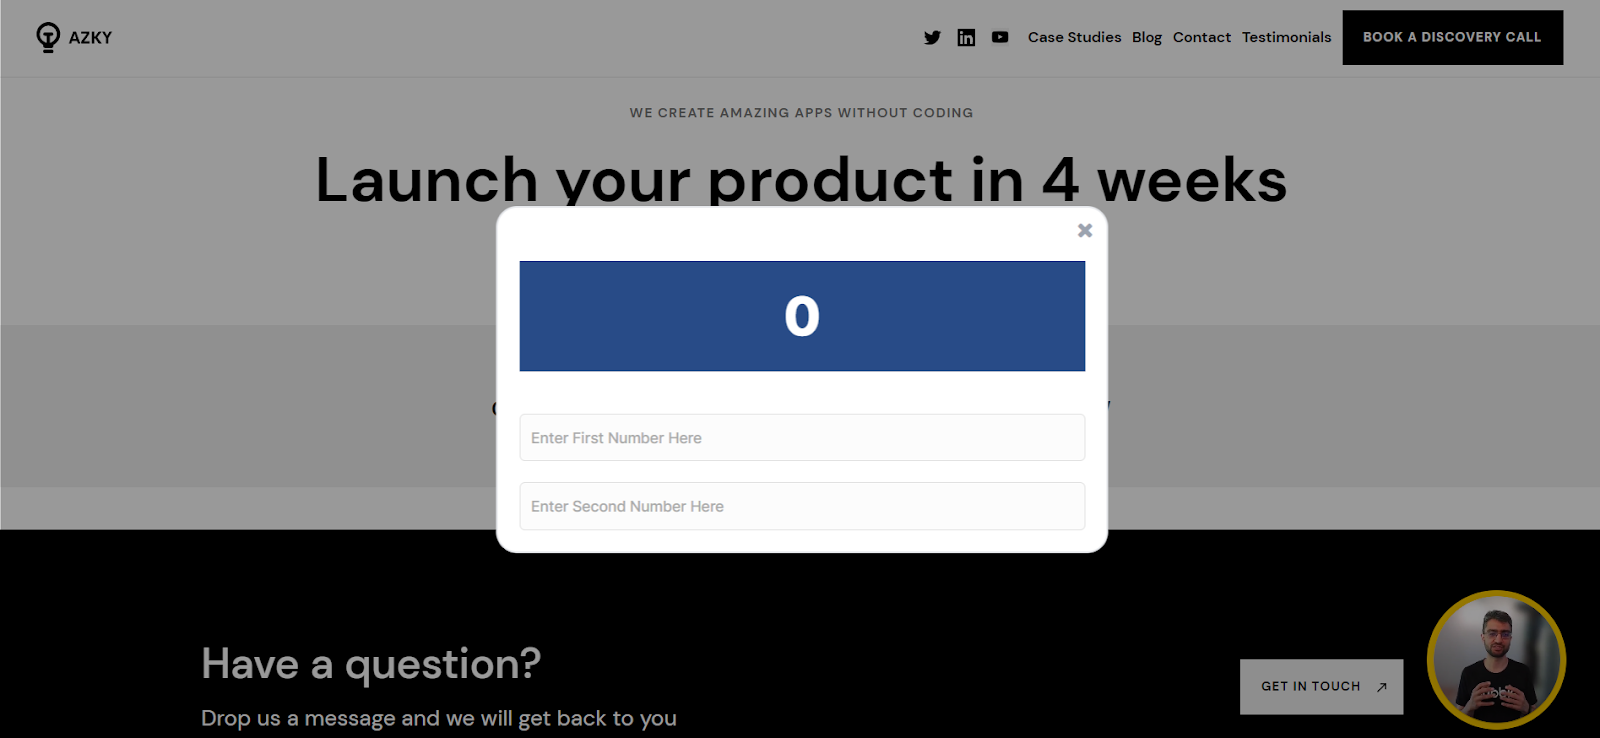
11. Test the Widget
Now you can run the application and you will see the button that we designed in our bubble editor.
Click on “Open Calculator” Button
The following popup will show up.

You can add any numbers to the input fields and it will display the result.
You can also click on the “close” icon to close the widget
If you are overwhelmed by this and would like us to build your product, get in touch!
Want to discuss this?
Book a call→